SwagerBuilds LLC · 4510 E 168 N, Rigby, ID 83442 · (208) 520-0636

Category: Process & Timeline

How custom home building works in Eastern Idaho — phases, timelines, permits, and what causes delays.

  • What a 20-Year GC Finds in Your Teton Valley Remodel Before You Sign

    The hidden costs in a Teton Valley whole home remodel almost always come from three places: envelope failures behind the siding, aging mechanicals that don’t meet current code, and structural surprises when walls open. A 20-year GC finds these in pre-construction — not during demo when they’re 3x more expensive. Here’s the actual checklist we run before we quote a fixed-price remodel.

    [Photo placeholder: Moisture probe in exterior wall during pre-construction]

    What Hidden Costs Show Up in a Teton Valley Remodel?

    The big three: exterior envelope, mechanicals, structural. Envelope surprises in Teton Valley are moisture damage behind failing WRB, rotten sheathing at window heads, foam board that trapped water against sheathing, and rodent damage in wall cavities from poor exterior sealing. Cost to remediate during a remodel: $8,000 to $45,000 depending on how many walls are affected.

    Mechanicals: undersized electrical service (pre-2010 Teton Valley homes are almost all 100A when a modern remodel needs 200A minimum), undersized panels, ungrounded circuits, plumbing that predates modern PEX/copper standards, HVAC that can’t handle a remodel’s added conditioned space. Cost: $12,000 to $35,000.

    Structural: undersized headers over doors where you want to change the opening, load-bearing walls that need beam engineering to remove, foundation cracks from freeze-thaw, insufficient anchor bolts in older builds. Cost: $10,000 to $60,000.

    How Does a 20-Year GC Find These Before Demo?

    Pre-construction walk with a real inspection kit. Moisture meter probes at exterior walls near windows, doors, and grade. Electrical panel review — wire type, amperage, dedicated circuits. Attic inspection for insulation coverage, air-sealing, ventilation. Crawlspace or basement inspection for foundation cracks, plumbing type, HVAC condition. Roof inspection. Sometimes we cut small exploratory holes in drywall to look at framing where the scope is heavy.

    Pre-construction alone takes 3 to 6 weeks for a whole home remodel. That’s where the fixed-price gets built. Skip it and you’re signing a contract on assumptions — which is how cost-plus contracts routinely finish 30 to 60 percent over estimate.

    What Are the Most Common Teton Valley Remodel Surprises?

    Number one: failed WRB behind siding in homes 15+ years old. The house wrap gets brittle in Teton Valley UV, wind, and freeze-thaw cycles. When siding comes off during a remodel, we find compromised WRB and often damaged sheathing. Whole-side re-wrap is a $6,000 to $18,000 add-in.

    Number two: undersized bath fans in older homes causing mold in wall cavities behind tile. Number three: knob-and-tube or aluminum wiring still active in mid-century Teton Valley homes. Number four: floor joists notched by prior plumbers/electricians in ways that violate current code and need sistering. Number five: foundation cracks from Teton Valley freeze-thaw that need pinning or partial rebuilds.

    Why Does Fixed-Price Handle This Better Than Cost-Plus?

    Fixed-price forces the GC to find the surprises before contract. If we don’t find them, we eat them. That aligns incentives — we’re motivated to do thorough pre-construction because our margin depends on being right about the scope. Cost-plus GCs have zero incentive to find surprises early; every surprise becomes a change order they bill on plus markup.

    Twenty years watching budgets blow up in this valley says the same thing every time: cost-plus remodels find the surprises during demo. Fixed-price remodels find them during pre-construction. The total money spent is often similar. The difference is who eats the surprises and whether the client knew the number when they signed.

    What Should You Ask a Teton Valley Remodel GC Before Signing?

    Ask if they’ll do a proper pre-construction inspection with moisture probe, panel review, and structural walk — not just a walkthrough with a clipboard. Ask if they’ll quote fixed-price after that inspection. Ask what happens when they find something they didn’t budget for. Ask for references from the last 3 remodels of similar size and call those references. Ask to see their JobTread or Buildertrend so you can verify how they track budgets in real time.

    Any GC who won’t do a proper pre-construction inspection before quoting isn’t going to be able to hold a price. That’s the tell.

    How Much Should You Budget for Surprises Even With Pre-Construction?

    Even with the best pre-construction, budget a 5 to 10 percent contingency for genuinely hidden conditions (rot behind unopened walls, discovered structural issues after demo starts). On a $600,000 whole home remodel, that’s $30,000 to $60,000 held back for the truly unexpected. Better GCs quote scope to their fixed contract and let you decide whether to hold contingency separately for above-and-beyond decisions.

    How Do I Get a Real Pre-Construction Assessment?

    Fill out swagerbuilds.com/start. Site walk within a week. Full pre-construction assessment 3 to 6 weeks after. Fixed-price contract with every SKU priced. See the whole home remodel hub or the full process.

    Frequently Asked Questions

    What’s the most common hidden cost in a Teton Valley remodel?

    Failed WRB and moisture damage behind siding in homes 15+ years old. $6,000-$18,000 per side to remediate.

    How long does a proper pre-construction assessment take?

    3-6 weeks for a whole home remodel including moisture probes, structural review, mechanical inspection, and product selection.

    Should I hold a contingency budget even with a fixed-price contract?

    Yes, 5-10% for truly hidden conditions revealed after demo starts.

    Do older Teton Valley homes always need electrical service upgrades?

    Pre-2010 homes with 100A service almost always need to go to 200A for a modern remodel with modern appliances and EV charging.

    Can I trust an estimate without pre-construction inspection?

    No. Any number quoted without a real inspection is a guess. Expect 30-60% cost creep on those contracts.

    Ready for Real Numbers?

    4th-gen Rigby builder. Real pre-construction. Fixed-price. No allowances. Start here.

  • The Snowder Project: A Whole-Home Transformation, Ground to Rooftop

    When the Snowder project came to SwagerBuilds, it wasn’t a single-room refresh. It was a commitment to transform an entire property — inside and out — into a home that lives better, works harder, and looks the part. We took it on the way we take on every build: with a plan, a standard, and a refusal to cut corners.

    From a new detached shop to a hidden door at the top of the stairs, here’s how the whole thing came together.

    The Project at a Glance

    The Snowder remodel was a top-to-bottom effort spanning the main house, the basement, and the property itself. The scope included:

    • A brand-new detached shop built from the ground up
    • A full interior repaint of the entire home
    • A new walk-in closet added onto the master suite
    • A new laundry room built into the basement
    • A custom wet bar added for entertaining
    • An enlarged basement bedroom for more comfortable living space
    • A hidden door at the top of the stairs
    • Upgraded cabinetry in both the kitchen and the laundry room

    Every piece of this was handled in-house to the SwagerBuilds standard — coordinated, sequenced, and finished clean.

    Building the Shop

    Every property that works hard needs a space that works just as hard. We built the Snowder shop new, from the foundation up — a durable, purpose-built structure designed for storage, projects, and everything a homeowner actually uses a shop for. It’s the kind of build that adds real function and real value to a property, and it set the tone for the quality carried through the rest of the project.

    Reimagining the Main House

    A Fresh Canvas: Full Interior Repaint

    We repainted the entire home, resetting the whole interior to a clean, cohesive palette. A full repaint does more than freshen things up — it ties every renovated space together so the finished home reads as one intentional design rather than a series of separate projects.

    A Walk-In Closet for the Master

    Storage is one of the first things homeowners wish they had more of. We added a dedicated walk-in closet onto the master suite — expanding the footprint of the primary bedroom and giving it the storage and function a master should have. The result is a suite that feels complete.

    Upgraded Kitchen Cabinetry

    The kitchen is the heart of the home, and cabinetry is what carries it. We upgraded the kitchen cabinetry to lift both the look and the everyday function of the space — better storage, cleaner lines, and finishes that hold up to daily life.

    Transforming the Basement

    The basement saw some of the biggest changes on the project — turning underused square footage into fully functional living space.

    A New Basement Laundry

    We built a new laundry room into the basement, adding a hardworking utility space exactly where it makes sense. Paired with upgraded laundry room cabinetry, it’s as functional as it is finished — storage, surface, and a clean look that makes a chore space feel like part of the home.

    A Custom Wet Bar

    Entertaining space earns its keep. We added a custom wet bar to the basement — the kind of feature that turns a basement into a destination. It’s built for gatherings, game nights, and hosting, and it anchors the lower level as true living space.

    An Enlarged Bedroom

    We enlarged one of the basement bedrooms, opening it up into a more comfortable, livable room. Reworking the footprint downstairs meant the basement gained genuine, usable bedroom space rather than a room that felt like an afterthought.

    The Detail That Steals the Show: The Hidden Door

    At the top of the stairs, we built a hidden door — the signature detail of the Snowder project. It’s the kind of craftsmanship that makes people stop and look twice: seamless when closed, effortless when opened, and executed with the precision that separates a real custom build from an off-the-shelf one. Features like this are exactly why homeowners come to SwagerBuilds — because the details are where the craft lives.

    The Result

    The Snowder project is a whole-home transformation done right. A new shop that adds function to the property. A main level reset and refined. A basement turned from underused space into a laundry, a wet bar, a bigger bedroom, and a lower level built for living. And throughout, the details — the cabinetry, the paint, the hidden door — that prove the difference is in the finish.

    This is what SwagerBuilds does: custom homes and luxury remodels across Eastern Idaho, Teton Valley, and Jackson Hole, built to a standard that holds up.

    Thinking about a remodel or a custom build of your own? Let’s talk about your project.

  • The Custom Home Design Phase: How to Get a Real Number Before You Sign

    # The Custom Home Design Phase: How to Get a Real Number Before You Sign

    TL;DR — The custom home design phase is where a real, buildable number gets built. It runs 6–12 weeks, costs 10–15% of your total build budget, and produces plans, engineering, and every material selection — the three inputs that make “fixed price” mean something. Below: what happens each week, what it costs, and why any builder who quotes without doing it is guessing.

    The custom home design phase is the pre-construction stretch where a builder turns your idea into a set of drawings, engineering, and specifications complete enough that a number on the last page is actually true. Depending on the size and site, it runs six to twelve weeks and costs somewhere between 10% and 15% of the total build budget. This post covers what happens week by week, what the design phase costs, what it produces, and why the number a builder quotes without doing it isn’t a real number at all. I’m Bryce Swager. I run [SwagerBuilds](https://swagerbuilds.com/) — a custom home builder covering Eastern Idaho, Teton Valley, and Western Wyoming. I do a paid design phase before I sign a fixed-price contract on any build. That’s not standard in this market. It’s the whole reason my pricing holds up. ## What “design phase” actually means The design phase is not the pretty renderings a spec builder shows you at the tradeshow booth. It’s not a 3D flythrough. It’s not a Pinterest board. The design phase is the engineered, scoped, priced set of documents that let a real builder quote a real number. It’s boring paperwork. It’s stamps from a structural engineer. It’s a spreadsheet with a Kohler faucet model number in a specific finish. It’s a snow-load calculation for the pitch of the roof you picked, in the specific climate zone the house is going to sit in. There’s a difference between an architect’s design work and a builder’s design phase. An architect’s job is to draw the house — the shape, the light, the feel. That’s real, valuable work. But an architect’s drawings, by themselves, don’t tell you what the house costs to build. They tell you what to build, not what to buy or how the framer prices the roof structure. A builder’s design phase sits on top of architectural drawings and answers the question the drawings can’t: how much. It’s the phase where the drawings become buildable, and the buildable becomes priced. My [honest guide to custom home pricing](https://swagerbuilds.com/honest-guide/) covers the longer version of why this distinction matters. ## The six things the design phase produces A design phase is complete when six things exist: **1. Buildable architectural plans.** Not just a floor plan. Every wall section, every elevation, every detail — how the deck ledger flashes, how the window sits in a thick-wall assembly, where the roof pitch changes and how it terminates. If the drawing set doesn’t show it, a sub-contractor will guess it. Guessing costs money in change orders. **2. Structural engineering stamps.** Foundation design, framing plan, beam sizing, shear-wall layout. Snow-load calculations for the actual site — a 60 psf ground snow load in Teton Valley is a very different beam than a 40 psf load in Ammon. Framing without a stamp is a bet, not a plan. **3. Complete material selections.** Every SKU, every finish, every fixture, every appliance model number, every knob and hinge and switch plate. This is the part most homeowners underestimate. “We’ll pick tile later” is how a $1.4M budget becomes $1.65M. A real design phase forces the decisions up front, when they can still move on paper instead of on site. **4. Site work assessment.** Soils testing, drainage plan, utility routing — how power gets to the house, where the meter sits, whether you’re on well and septic and what those add. On a Teton Valley lot with a long driveway and a shallow water table, site work can be a six-figure line item on its own. **5. Sub-contractor bid packages.** Each trade — foundation, framing, plumbing, electrical, HVAC, roofing, drywall, tile, cabinets, flooring — gets a scoped package with the drawings and specs for their piece. They quote to that package, not to a napkin. When ten trades all quote to the same document, the final number is built from ten hard numbers, not one builder’s best guess. **6. The final fixed-price number.** The sum of the above, plus a contingency for the unknowns that always exist — bad soils, a code update mid-permit, weather delays. That’s the number that goes on the contract. You can’t get to a real number without those six inputs. Anyone who says otherwise is either guessing or planning to make up the difference in change orders later. ## Week by week — what a SwagerBuilds design phase looks like Here’s how the twelve weeks typically run on a $1.5M Rigby-area build. Bigger jobs — a $3M mountain build in Alta or Wilson — often stretch to fourteen or twenty weeks because the engineering is heavier and the selections are more custom. Smaller remodels run tighter. **Weeks 1–2: Programming.** What are you building, for who, on what land, at what standard? I walk the lot with the client. We talk square footage, room count, how the family lives, where the sun rises, what the neighbor’s driveway does to your view. I take notes. I don’t draw anything yet. **Weeks 3–5: Schematic design.** The architect drafts a floor plan and massing — the shape of the house on the site. We iterate. A wall moves. A window grows. The garage rotates ninety degrees to solve a driveway problem. By the end of week five, the footprint is locked. **Weeks 6–7: Detailed design.** Every wall gets a section. Every window gets a size and a manufacturer. Every roof plane gets a pitch, a material, and a snow retention plan. Drawings go from “concept” to “buildable.” **Weeks 8–9: Engineering and selections.** The structural engineer runs the numbers and stamps the plans. In parallel, the client and I pick every finish. Not “white oak floors” — a specific white oak floor from a specific mill in a specific width and finish, with a per-square-foot price. Not “quartz counters” — the exact slab, the exact edge profile. **Weeks 10–11: Bid packages out to subs.** Each trade gets a scoped package and two weeks to quote it. I follow up in writing so no one later claims the scope wasn’t clear. **Week 12: Final number, contract, permit.** I sit down with the client with the actual number. If they want to bring it down — swap a countertop, simplify a roof detail — we do that now, before signature. Once we agree, the contract signs and the permit application goes to the county. That’s the version I run. Other builders run different variations. But the timeline shape — programming, schematic, detailed, engineering, selections, bids, final number — is roughly universal for any builder doing real design work. ## What the design phase costs The design phase costs 10–15% of the total build budget. On a $1M build, that’s $100K–$150K. On a $3M Teton Valley build, $300K–$450K. It scales with complexity. A simple two-story on a flat lot with a spec-grade material set lands at the low end. A four-level mountain build with a walk-out basement, structural steel, custom cabinets, and a geotech-required foundation lands at the high end. Where does the money go? – Architect fees (usually the largest single line) – Structural engineer (foundation, framing, snow load) – Geotech testing if the site requires it – Interior designer, if the client brings one in – My time coordinating the above, running selections, running the bid process, and building the final number Important: **the design phase is paid separately from the build contract.** You are not paying a retainer against a construction budget. You are paying for design work. You get the drawings, the engineering, and the specifications regardless of whether you build with me. Fair question: **what happens if you walk?** If you go through the design phase and decide not to build — or build with a different contractor — the money doesn’t come back. The work is done. The engineer stamped the plans. The subs bid the packages. Nobody worked for free. I say that up front, on paper, before a check is written. ## Why “fixed price” without a design phase is a lie A quote based on a floor plan sketch and a written scope is not a fixed price. It’s a guess dressed up in a contract. Here’s how it works. A builder wants your job. He gives you a number — say $850,000 for a 3,000-square-foot Rigby build — with a stack of “allowances” baked in. $8,000 for cabinets. $5,000 for lighting. $12,000 for tile. $6,000 for appliances. Nobody has picked cabinets. Nobody has picked lighting. Those numbers are placeholders — the builder had to put something in to hand you a total. When you go to pick cabinets, the ones you want cost $28,000. You get a change order for $20,000. Same story on lighting. Same story on tile. Same story on twenty other allowance lines. By the time the house is done, your $850K contract has become $1.15M in signed change orders. The builder — who quoted the lowest number in your bid stack to win the job — is now making his real margin on the changes. You can’t fight him. The walls are up. You’ve paid a big deposit. You’re captive. That’s the mechanic behind every “we agreed on $800K, ended up at $1.2M” story your neighbor tells you. It isn’t fraud. It’s built into the contract. The builder didn’t lie. He quoted a number that was never real, and the change orders were the plan. The design phase is the fix. When every allowance is a selection with a SKU and a price, there is nothing to change-order. When every trade has quoted to a scoped package, there is nothing to renegotiate. The number on the contract is the number you pay. ## When cost-plus is honest, and when it’s a trap Cost-plus — where you pay the actual cost of the build plus a percentage fee to the builder — is a legitimate contract in specific situations. It’s a trap in most of the others. This series covers it in depth in the next post, but the design-phase lens is useful here. Cost-plus **with** a paid design phase is a weird combo. If the whole point of a design phase is to produce a fixed number, why sign an open-book contract that bills you whatever the true cost turns out to be? There are honest reasons — genuinely unknown site conditions, a client who wants to change scope mid-build — but they’re the exception. Cost-plus **without** a design phase is where the trouble lives. This is the “we’ll figure it out as we go” contract. You are writing blank checks. Every decision made on site is billable at cost plus the fee. Every mistake, every rework, every over-order — you pay for it. The builder has no incentive to run a tight job, because a loose job pays him more. Both contract types can be honest. Neither is honest without a design phase behind it. Posts 3 and 4 in this series cover the full teardowns. ## The design phase as a filter — what happens if you skip it I’ve watched clients skip the design phase because a competing builder promised a faster start and a lower quote. The industry data on the outcome is consistent: – **Change orders on unpriced builds average 15–35% of contract value.** On builds with a real design phase behind them, change orders average 2–5%. That’s the difference between a $150K overrun and a $30K one on a $1M build. – **Timeline overruns on unpriced builds average four to seven months.** On priced builds, they’re closer to two to six weeks — and most of that is weather, not scope. – **You lose your negotiating position the moment construction starts.** The walls are up. The money is spent. You aren’t going to fire your builder mid-frame — the cost of switching is worse than the cost of finishing. This is why the builder who quoted low needs to keep costs invisible until the site is committed. The design phase is what keeps that from happening. This isn’t hypothetical. It’s the pattern behind almost every “our custom home was a nightmare” story in the local market. Skipping the design phase is how the nightmare starts. ## When it makes sense to skip the design phase A few real cases where a paid design phase is overkill: – A small, tightly-scoped remodel — kitchen refresh, bathroom rebuild — where the scope is truly contained and the finishes are picked before the contract. – Cost-plus at close-friend or family rates, where both sides genuinely understand the exposure and the builder isn’t trying to grow margin on changes. – A repeat build using a plan set the builder has already built two or three times, where selections and engineering are largely locked before you walk in the door. Outside of those, skipping the design phase on a $1M–$5M custom build is how you end up in a lawsuit. This is why I publish floor pricing on the site — $285–$500 per square foot for Rigby, Idaho Falls, and Ammon, and $550–$1,200 per square foot for [Teton Valley builds](https://swagerbuilds.com/cost-to-build-custom-home-teton-valley-2026/). The number filters out clients shopping for the lowest bidder — usually the same client who ends up on the wrong end of a change-order contract with someone else. I’d rather lose that client early than fight them at month nine. ## FAQ **How much does the custom home design phase cost?** Between 10% and 15% of your total build budget. On a $1M build, that’s $100K–$150K. On a $3M mountain build in Teton Valley or Jackson, expect $300K–$450K. The percentage runs higher on complex sites, lower on simple lots. **How long does the design phase take?** Six to twelve weeks for a straightforward Eastern Idaho build. Fourteen to twenty weeks for a larger custom mountain home with heavier engineering, custom cabinetry, and a longer selections list. The timeline stretches with complexity, not with builder speed. **Do I own the plans at the end of the design phase?** You use the plans for your build — permit them, build them, live in them. I retain the right to sell those plans as spec plans to future clients. That’s how I keep the design phase cost reasonable and how great designs get built more than once. If you want exclusive rights to the plans, we can negotiate that separately at kickoff — it costs more. Whatever we agree to is in writing before we start. **What if I change my mind mid-design?** That’s the point of doing the design phase before construction. Every change made during design is cheap — pencil on paper. Every change made after construction starts is expensive — labor, materials, and rework. This is the phase to change your mind in. **Can I get plans without hiring the builder for construction?** Yes. A paid design phase produces a complete document set any competent contractor can build from. If you take my design set to another builder, that builder can quote it. That’s why I don’t discount the design phase — the work stands on its own. **What if my architect already did plans — do I still need a builder-led design phase?** Usually yes. Architectural plans, even good ones, rarely include the selection detail, sub bid scoping, and priced-out material list a fixed-price contract needs. A builder-led design phase sits on top of the architectural set and adds the buildable, priced layer. If your architect’s set already has all six things listed above, you may be closer to done than you think. Send it over and I’ll tell you honestly. ## Related posts in this series This is post 1 of a 6-part series on how custom home builders actually price work — and how to tell an honest contract from one designed to grow on you. 1. **The Custom Home Design Phase: How to Get a Real Number Before You Sign** (this post) 2. Cost-Plus vs Fixed-Price — Which One Are You Actually Signing? — [Read →](https://swagerbuilds.com/cost-plus-vs-fixed-price-custom-home-contract/) 3. Cost-Plus Contracts — A Working Builder’s Honest Take — [Read →](https://swagerbuilds.com/cost-plus-custom-home-contract-honest-guide/) 4. Fixed-Price — What Real Fixed-Price Requires — [Read →](https://swagerbuilds.com/real-fixed-price-custom-home-what-it-requires/) 5. GMP (Guaranteed Maximum Price) — When It’s the Right Move — [Read →](https://swagerbuilds.com/gmp-guaranteed-maximum-price-custom-home/) 6. Time & Materials — When It Makes Sense and When It’s a Trap — [Read →](https://swagerbuilds.com/time-and-materials-custom-home-contract/) ## If you’re planning a build The one question to ask any builder before you sign anything: **”Do you do a paid design phase before you quote, and can you show me the deliverables from your last three clients?”** If the answer is no, you are not getting a real number. You are getting a marketing number, and the change orders are the plan. If you’re planning a build in Eastern Idaho, [Teton Valley, or Driggs](https://swagerbuilds.com/driggs-idaho-custom-home-builder/), or the mountain side around Jackson, Wilson, and Alta — and you want a builder who quotes what he can actually deliver — [get in touch](https://swagerbuilds.com/contact/). I’ll tell you honestly whether your project is a fit for a paid design phase or whether you’re better off with a different approach. That answer is free. The design phase, when it starts, isn’t.
  • How Long Does It Take to Build a Custom Home in Idaho?

    How Long Does It Take to Build a Custom Home in Idaho?

    14 to 18 months from contract signing to keys in hand. That’s the honest answer for a luxury custom home in Eastern Idaho, whether you’re building in Driggs, Victor, Tetonia, Idaho Falls, Rigby, or anywhere in between. Some builders will quote you 10 months. Some will scare you with 24. The real number, on a real Teton Valley luxury build, is 14 to 18.

    This guide breaks down each phase month by month, tells you exactly what’s happening and what should be happening, and flags the four things that cause 90 percent of build delays in Idaho. If you’re early in the process, this is the article that keeps your timeline honest.

    How long does it take to build a custom home in Idaho?

    14 to 18 months on average for a luxury custom home in Eastern Idaho, from signed contract to move in. Preconstruction, meaning design, permits, and contracts, takes 4 to 6 months. Active construction takes 10 to 12 months. Teton Valley builds tend to run on the longer end because of winter weather and permit timelines.

    The 7 Phases of a Custom Home Build

    Every well run custom home moves through the same seven phases. The duration of each one is fairly predictable. Where builders blow up timelines is by collapsing or skipping the early phases, then paying for it on the back end.

    PhaseTypical DurationWhat’s Happening
    1. Discovery and Predesign1 to 2 monthsSite evaluation, budget alignment, builder selection, contracts
    2. Design Development2 to 3 monthsArchitect, schematic design, design development, construction drawings
    3. Permits and Engineering1 to 2 monthsStructural engineer, septic design, county permit submission
    4. Preconstruction1 monthFinal budget, subcontractor lock in, materials ordered, lot prep
    5. Foundation and Framing2 to 3 monthsExcavation, foundation, wall framing, roof structure
    6. Mechanical and Exterior3 to 4 monthsHVAC, plumbing, electrical, roofing, siding, windows
    7. Finishes and Closeout4 to 5 monthsDrywall, cabinets, flooring, paint, fixtures, punch list, occupancy

    Total active timeline: 14 to 18 months. If anyone tells you 10 months for a true custom build in Teton Valley, they’re either skipping design phases or planning to apologize later.

    Month by Month Breakdown for a Driggs Custom Home

    Here’s what a typical 16 month Driggs build actually looks like. The numbers below assume a contract signed in March, which is a smart timing call I explain further down.

    • Months 1 to 2 (March and April): Discovery, builder selection, contract signing, lot evaluation, budget alignment.
    • Months 3 to 5 (May through July): Architectural design. Concept sketches, then schematic design, then design development. Don’t sign a builder contract before this phase ends.
    • Months 6 to 7 (August and September): Construction documents finalized, structural engineering, septic system design, mechanical engineering. Permit application submitted to Teton County.
    • Month 8 (October): Permits issued, preconstruction meeting, final material orders, subcontractor schedules locked.
    • Months 9 to 11 (November through January): Foundation, framing, roof structure. Yes, we frame through an Idaho winter. The trick is getting under roof before mid December.
    • Months 12 to 13 (February and March): Mechanical rough ins, insulation, drywall, siding, exterior trim.
    • Months 14 to 15 (April and May): Cabinets, flooring, interior paint, trim, primary fixtures.
    • Month 16 (June and July): Final fixtures, exterior finish work, landscaping, final inspection, certificate of occupancy, walkthrough, keys.

    The Four Things That Cause 90 Percent of Delays

    After more than 20 years of building in Idaho, four problems blow up timelines more than everything else combined. Plan for them up front and your build runs on time.

    • Late design decisions. Want to change the kitchen layout in month 12? That’s a 3 to 4 week delay minimum, plus a $15,000 to $30,000 change order. The fix is to lock all design decisions before you break ground.
    • Material lead times. High end windows from Marvin, Sierra Pacific, or Loewen are running 16 to 22 weeks in 2026. Custom cabinets are 14 to 18 weeks. If your builder doesn’t order the long lead items the day after permits drop, you’ll lose 6 to 8 weeks waiting.
    • Subcontractor scheduling in Teton Valley. The good HVAC, drywall, and tile crews are booked 6 to 9 months out. If your builder doesn’t have those slots locked before construction starts, you’re going to pay rush rates or wait.
    • County inspection backlog. Teton County and Bonneville County both run behind in spring and summer. Build an extra 2 to 3 weeks of inspection buffer into your schedule and you won’t get burned.

    Should You Start in Spring or Fall?

    This is the question every Eastern Idaho client asks me, and the answer surprises most people.

    Sign your contract in March or September. Break ground in October or April.

    Here’s why. Signing in March puts your active construction starting in October, which means you finish framing and get under roof through the fall, then do interior work all winter when nothing else stops the build. You move in early summer. Best case scenario.

    Signing in summer is the worst timing. Permits hit in fall, you break ground in winter, you lose 6 to 8 weeks to weather, and you don’t move in until 18 to 20 months later instead of 14 to 16.

    If you’re calling builders right now in May 2026, your realistic target is to break ground in March 2027 and move in around August 2028.

    How a Real Driggs Build Stays on Schedule

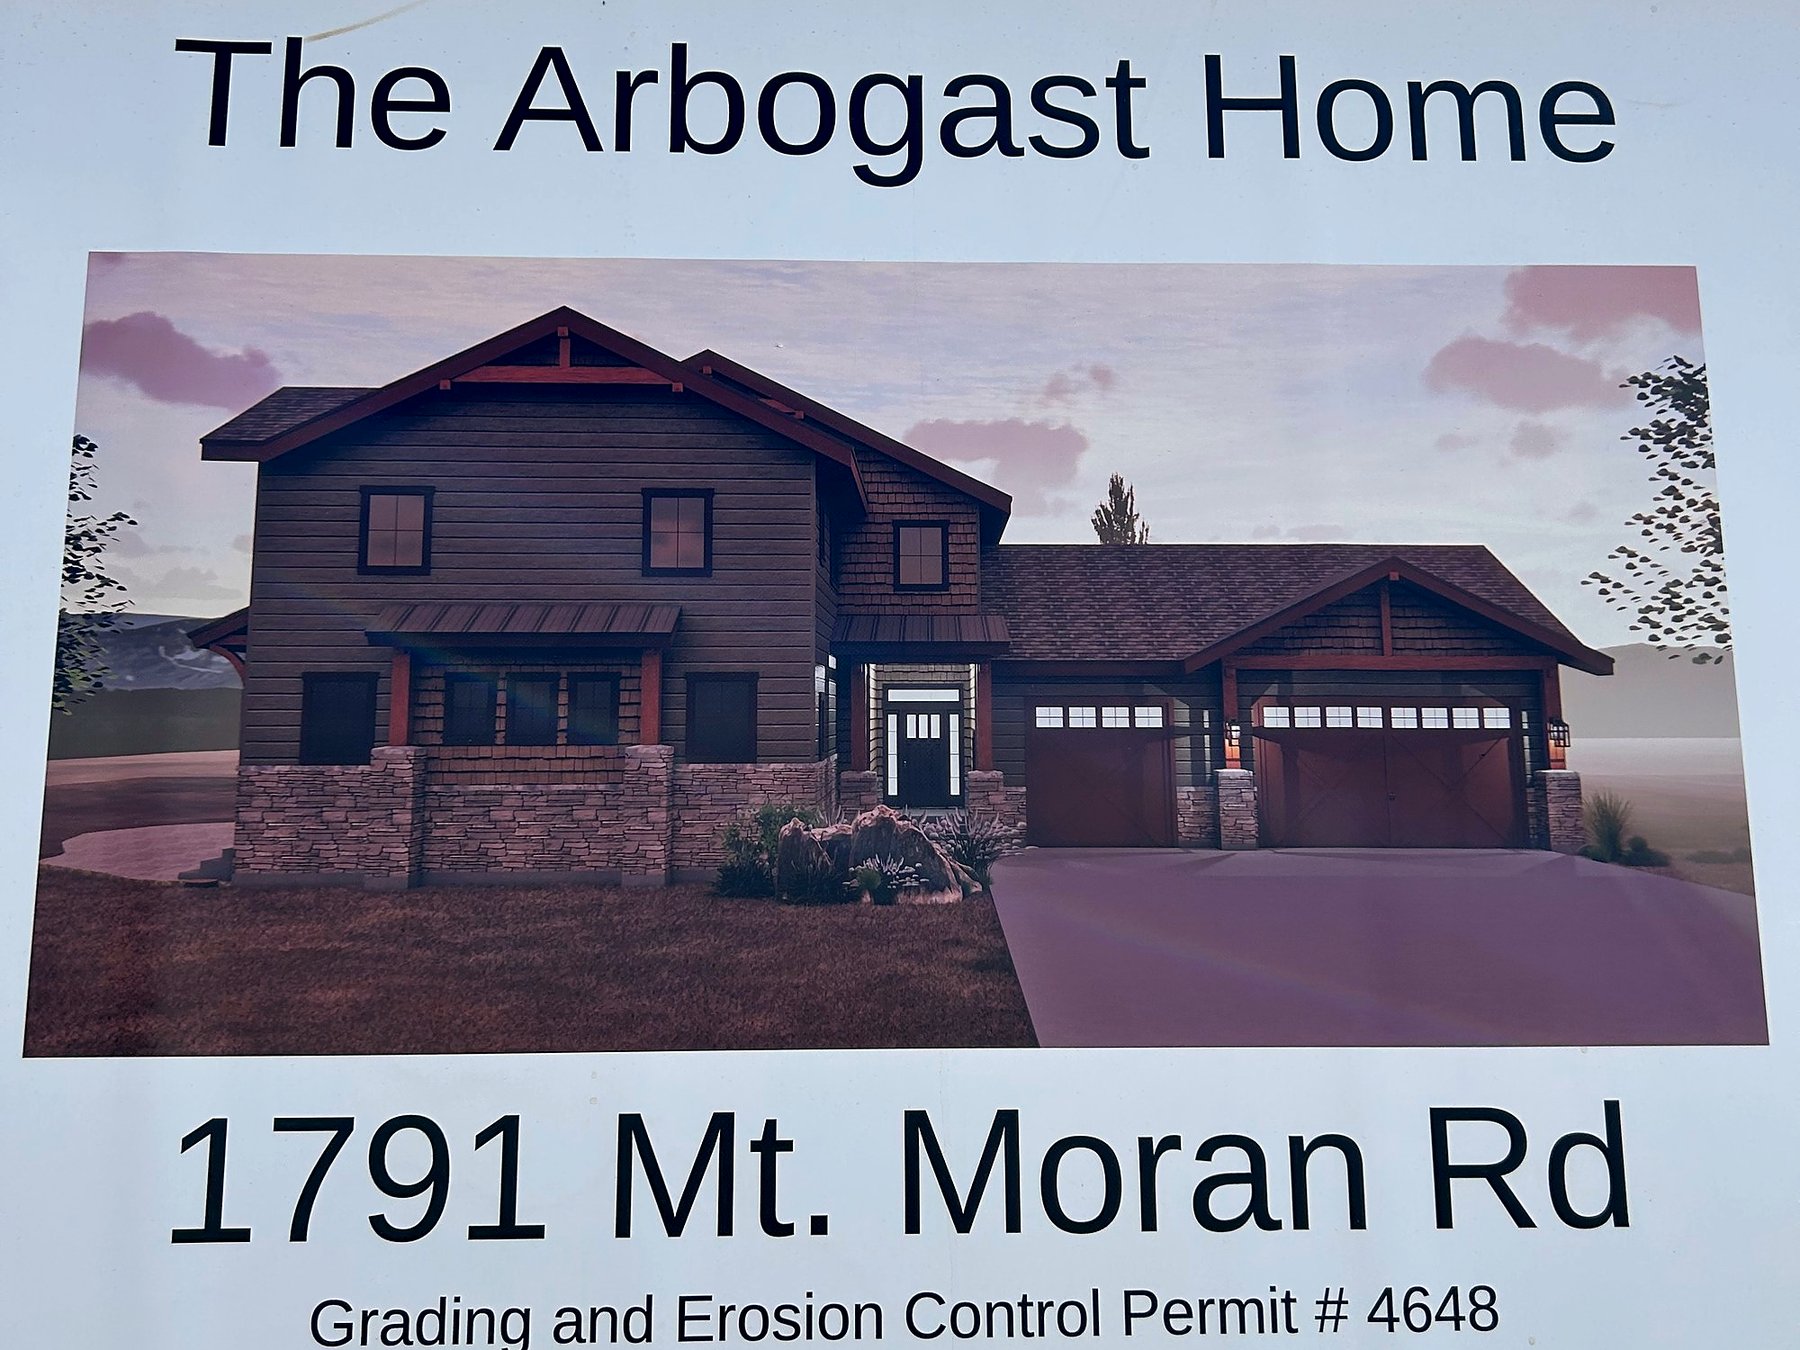
    The Arbogast project we completed in 2025 finished in 15 months, two months faster than the 17 month average for a 3,200 sq ft luxury Driggs build. Here’s exactly how.

    • Design lock in by month 4. The owners committed to the layout, kitchen, primary suite, and exterior elevation by the end of design development. We didn’t entertain changes after that point unless they were under $5,000 and didn’t affect a subcontractor schedule.
    • Long lead orders placed in week 1 of permitting. Windows were ordered before permits even came back. They arrived right when we needed them.
    • Prelocked subcontractor slots. Six months before breaking ground, every major sub had a written slot agreement with deposits.
    • Weekly 30 minute owner meetings. Same time every week. Decisions made on the spot. Nothing waits a week for a let me think about it answer.

    That’s not magic. It’s just what disciplined custom building looks like.

    Common Questions About Build Timelines in Idaho

    Can a custom home in Idaho be built in 12 months?

    For a true custom home with luxury finishes, 12 months is unrealistic in Eastern Idaho. The exceptions are a smaller build under 2,500 sq ft, a stock plan that skips full architectural design, or a build where the owner is willing to accept builder grade finishes.

    Does building in winter slow things down?

    Not significantly, if your builder knows what they’re doing. Foundation pours need temperature blankets and accelerator additives. Framing happens fine in cold weather. The trick is getting under roof before the worst storms hit, which is mid December in most years, so you want to start framing by late September.

    How long does the design phase take?

    For a custom home, plan 4 to 5 months from kickoff with the architect to completed construction documents. Skipping or rushing this phase is the number one cause of expensive surprises during construction.

    Do you do design build or work with outside architects?

    Both. Design build typically saves 4 to 8 weeks because design and construction are coordinated by one team.

    What happens if the build runs over schedule?

    In our contracts, schedule overruns that are on the builder, like subcontractor failures or missed deadlines, are on us. Overruns from owner change orders, weather events, or supply chain delays get documented and added to the schedule.


    Thinking about your build timeline?

    If you’re 6 to 12 months out from breaking ground in Driggs, Victor, Tetonia, Idaho Falls, or Rigby, the timing of your design and contract decisions matters more than almost anything else. We do a free 30 minute call where we look at your timeline, your land status, and the realistic schedule for your build.

    Schedule a discovery call

    Or DM “TIMELINE” to @swagerbuilds on Instagram and we’ll send you our 16 month Teton Valley build calendar template.

  • Barndominium Builder Eastern Idaho (2026): Cost & Timeline

    A barndominium gives you a shop and a home under one roof — framed in steel, finished like a house, and sized to whatever your land and budget will allow. In Eastern Idaho, the demand for these builds has tripled since 2023. Here’s what they actually cost, how long they take, and the design calls that decide whether you end up loving it or fighting it for 20 years.

    What a barndominium actually costs in Eastern Idaho (2026)

    Shell-only post-frame builds in our region run $80 to $120 per square foot. A mid-range turnkey build with full interior finishes lands between $150 and $200 per square foot. Custom luxury builds with stone, timber accents, and high-end mechanicals run $225 to $300+ per square foot.

    On a 3,000 sq ft barndominium (say, 1,800 sq ft of living and 1,200 sq ft of shop), that puts you in the $450K to $900K range depending on finish level. Site work, septic, and well are typically additional and run $40K to $90K in our rural areas.

    The timeline reality

    Permit through move-in for a typical Eastern Idaho barndominium: 9 to 14 months. Steel package lead times run 8 to 16 weeks. Site work has to happen before winter freeze, so if you’re starting after September you’re looking at a spring start regardless.

    Three decisions that decide everything

    1. Shop-first or living-first?

    If you spend more time in the shop than the living space (most of our clients do), build the shop floor first, finish the living quarters later. Lets you start using the structure 6 months earlier.

    2. Slab thickness

    For a working shop with heavy equipment, a tractor, or a lift, you want a minimum 6” slab with #4 rebar on 12” centers. Skipping that to save $4K early costs you $40K to tear out and re-pour later.

    3. Insulation for Idaho winters

    Closed-cell spray foam at R-25 minimum on walls, R-49 ceilings. Anything less and your propane bill in January will hurt.

    How we build barndominiums at SwagerBuilds

    Every build starts with a site walk and a one-page scope. We work in JobTread so you get real-time photos, daily updates, and a clear running budget. No padded change orders, no missing line items at the end.

    Common questions

    Can I finance a barndominium in Idaho?

    Yes, but you’ll want a construction-to-permanent loan from a lender that knows post-frame. Most national banks don’t. Local Eastern Idaho credit unions and a handful of Wyoming lenders do.

    How long do they last?

    A properly built post-frame barndominium with steel siding and roofing has a 60–80 year structural life. The metal skin needs paint or replacement around year 30–40 — same as a comp shingle roof.

    Will it appraise?

    This is the biggest stumbling block in our market. Appraisers in Rigby, Idaho Falls, and Rexburg are getting more comps every year, but you should not assume your barndominium will appraise at construction cost. Build for what you want to live in, not for resale.

    Next steps

    If you’re planning a barndominium build in Rigby, Idaho Falls, Rexburg, or anywhere in Teton Valley, send us your site plan and rough scope. We’ll give you a real budget range — not a guess — within 5 business days.

    Start your barndominium project with SwagerBuilds →