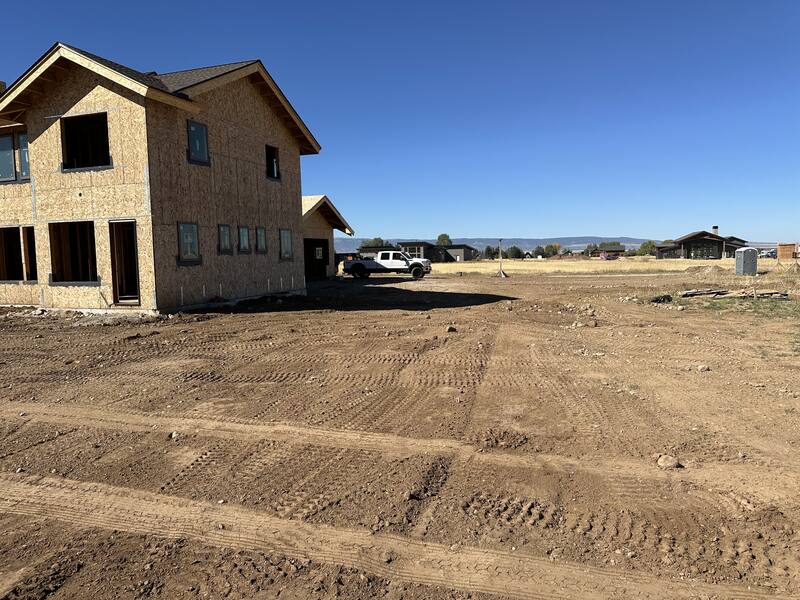
Custom home build schedule delays in Idaho are the second-most common complaint in builder reviews, right behind cost overruns — and like overruns, most of them are predictable. “The only delay we had was four weeks” is the kind of line you see even in positive reviews, because some slippage is treated as inevitable. It is not. Here is a builder’s breakdown of why custom home build schedule delays happen in Idaho and how a disciplined builder keeps your project on time.
What causes custom home build schedule delays in Idaho?
Custom home build schedule delays in Idaho come from five main sources: permitting timelines, weather and the short building season, subcontractor availability, late owner selections, and unforeseen site conditions. In Eastern Idaho and Teton Valley the season matters more than most owners expect — you do not want to be pouring foundations in January if you can help it. A good builder does not pretend these risks do not exist. They schedule around them.
How permitting and the Idaho building season cause delays
Permitting and the short Idaho building season cause schedule delays when a build starts at the wrong time of year. Permit review in Teton, Jefferson, and Madison counties can take weeks, and if that pushes your dirt work into deep winter, you lose ground. The fix is sequencing: get design, engineering, and permits done over the winter so you break ground as soon as the ground allows, and you get the weather-sensitive work — excavation, foundation, framing, dry-in — done in the good months. Builds that start late chase the season all year.
How subcontractors and selections cause schedule delays
Subcontractors and late selections cause schedule delays more often than weather does. In a busy market the good trades — framers, electricians, plumbers, drywall crews — are booked out, and a build only stays on time if those crews are scheduled and confirmed well ahead. Owner selections are the other silent killer: if your cabinets, windows, or tile are not ordered on time, the whole sequence stalls waiting on a six-week lead item. A builder who manages subs tightly and pushes you to lock selections early is protecting your schedule, even when it feels like nagging.
How a builder keeps a custom home on schedule
A builder keeps a custom home on schedule with a real construction schedule, confirmed subs, and a selections deadline tied to lead times — not optimism. That means a week-by-week plan built backward from your move-in, long-lead items ordered early, trades locked in before they are needed, and the owner getting honest updates when something shifts. It also means handling problems before they cascade: the best schedule protection is a builder who spots the conflict three weeks out instead of the day the crew shows up. At SwagerBuilds we build the schedule the same way we build the budget — detailed up front, so there is little left to surprise us.
Questions to ask about schedule before you hire a builder
You can gauge schedule risk by asking an Idaho builder a few pointed questions. Ask: “Can I see a sample construction schedule from a recent build?” Ask: “What time of year will we break ground, and why?” Ask: “Are your subs confirmed before my start date or booked as we go?” Ask: “When do you need my selections finalized, and what happens if a lead item is late?” A builder with schedule discipline answers in specifics. A builder who shrugs and says “it takes what it takes” is telling you to expect the four-week delay — or worse.
The bottom line on custom home build schedule delays
Custom home build schedule delays in Idaho are mostly a planning problem, not a weather problem. Permitting, season, subs, and selections are all knowable risks, and a builder who sequences the work around them keeps your project on time. Reviews that praise a builder for finishing “on time without the usual hassles” are really praising one thing: a builder who planned. That is the standard worth hiring to.
Want a build with a real schedule and an honest start date? Contact SwagerBuilds to talk timeline for your project in Eastern Idaho, Teton Valley, or Jackson Hole.
TL;DR: Exterior waterproofing — picking the right water-resistive barrier and air barrier — is one of the most important decisions in your build. Every modern wall needs a water-resistive barrier and an air barrier — sometimes the same product does both. The right choice depends on building type, climate, budget, and how forgiving you want the install to be. ZIP and LP WeatherLogic combine sheathing and WRB into one panel. Tyvek is the proven stapled house wrap. Fluid-applied is the premium air barrier for high-performance builds. This guide walks through how a custom builder actually picks.
What is a water-resistive barrier (WRB) and why does every home need one?
A water-resistive barrier is the layer in your wall assembly that keeps bulk water — wind-driven rain, snowmelt running down the sheathing, condensation — from reaching the framing and insulation. Without one, your wall will rot from the outside in. Modern building code (IRC Section R703.1) requires a WRB on every exterior wall.
An air barrier is a different job: it stops air from leaking in and out of the wall. Air carries moisture, so a leaky wall is also a wet wall. Some products do one job. Some do both.
The cleanest way to think about it: the WRB stops liquid water from getting in. The air barrier stops energy (and the water vapor that hitchhikes on it) from sneaking through. A well-built wall has both. For a deeper dive, Building Science Corporation publishes some of the clearest WRB and air-barrier research available.
The four categories of exterior waterproofing
The products on the market fall into four buckets:
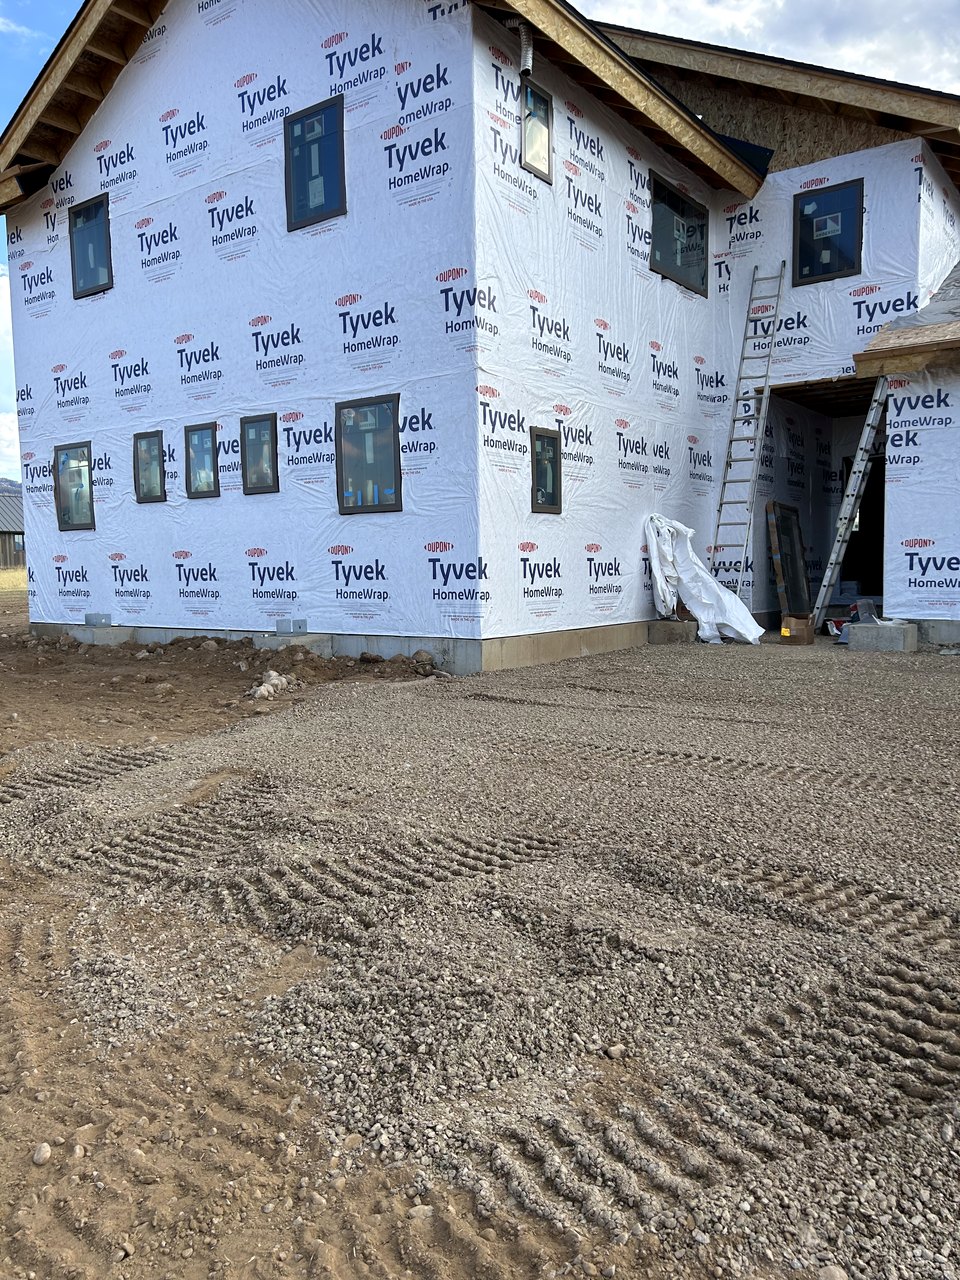
Mechanically-attached house wraps — Tyvek HomeWrap, Typar, Barricade. A sheet membrane stapled over sheathing. The proven workhorse.
Integrated structural sheathing — Huber ZIP System, LP WeatherLogic. OSB with a factory-bonded WRB face. Tape the seams and you have sheathing + WRB + air barrier in one product.
Fluid-applied WRBs — Prosoco R-Guard Cat 5, Henry Air-Bloc 33MR, Tremco ExoAir 230, Sto Gold Coat, Polywall Blue Barrier. Rolled or sprayed onto sheathing, cures into a seamless air and water barrier.
Self-adhered membranes — VaproShield, Henry Blueskin, Carlisle Barritech VP. Peel-and-stick sheets. Common on commercial work, occasionally specced on high-performance residential.
The four products that cover 90% of custom-home decisions in 2026
Almost every custom home in 2026 is going to use one of four systems: Tyvek over OSB, ZIP System, LP WeatherLogic, or a fluid-applied air barrier over OSB. Here’s how they compare on the specs that actually matter.
System
What it is
Perm rating
Max UV exposure
Typical $/sq ft installed
Best use
Tyvek HomeWrap + OSB
Sheet membrane stapled over standard sheathing
~56 perms (high)
120 days
$0.25–$0.75
Production homes, remodels, budget-conscious custom builds
Huber ZIP System
OSB with factory-bonded WRB + seam tape
12–16 perms
180 days
$1.50–$2.50
Custom homes chasing air-tightness and a faster dry-in
LP WeatherLogic
OSB with SmartSide WRB face + seam tape
5.35 perms
180 days
$1.25–$2.25
Custom homes where supplier carries LP, often slightly cheaper than ZIP
Fluid-applied (Cat 5, Air-Bloc, ExoAir)
Roller- or spray-applied seamless membrane over OSB
varies — most 10–25 perms
varies by product
$0.85–$1.00 (material + labor over OSB)
Passive House targets, complex geometries, commercial-grade residential
Prices reflect 2026 supplier conversations in eastern Idaho. Confirm with your supplier — these move with OSB and resin markets.
How to actually pick: the decision matrix
Builders don’t pick a WRB in a vacuum. The decision is three-dimensional: building type × climate × budget. Here’s the shortcut.
If you’re building a tight custom home in a cold climate and chasing low ACH numbers: ZIP System or a fluid-applied air barrier. The integrated WRB and air barrier earn their cost back in blower-door results.
If you’re building a custom home in a mixed climate on a normal budget: Tyvek HomeWrap or CommercialWrap over standard OSB. Reliable, forgiving, repairable.
If you’re building under stucco, fiber cement, or any reservoir cladding: Tyvek DrainWrap or CommercialWrap D. The drainage face matters more than the WRB itself.
If you’re building a barndominium or shop home with metal siding: Tyvek HomeWrap or ZIP, with extra attention to the tape and the screw penetrations.
If you’re chasing Passive House numbers or building something with crazy geometry: Fluid-applied. Seamless wins.
The questions to ask before you specify any WRB
Before you let your builder lock in a WRB, get answers to five questions. These flush out whether the system was actually chosen for the build or chosen because it’s what the lumberyard had on the truck.
What’s the perm rating, and is that the right number for our climate?
How long will it sit exposed before siding goes on, and is that within the manufacturer’s UV limit?
What’s the tape or sealant system, and has the crew installed it before?
How does it integrate with the window flashing details?
What’s the warranty, and what voids it?
What we spec at SwagerBuilds — and why
On most of our Teton Valley custom builds, we lean toward ZIP System for the wall sheathing. The cold dry winters here want a vapor-permeable WRB that lets the wall dry outward, ZIP’s 12–16 perm rating fits, and the integrated air barrier helps us hit better blower-door numbers without specifying a separate fluid-applied product. On budget-conscious builds and on remodels where we’re tying into existing framing, Tyvek HomeWrap with proper flashing earns its keep. We’ve also been having more conversations with homeowners about Prosoco Cat 5 on the high-performance end — the math gets interesting on a Passive-House-curious build.
The honest answer is that the WRB is one decision in a system. The window flashing, the rain screen detail, the air-sealing at the rim joist — all of that matters as much as the brand on the wall. If a builder tells you ZIP is “the only right answer” or that Tyvek is “outdated,” you’re not getting a builder’s take. You’re getting a sales pitch.
FAQ
What is the best water-resistive barrier for a custom home in 2026?
There is no single best WRB. For a typical custom home in a cold mountain climate, ZIP System or Tyvek HomeWrap over standard OSB both work. ZIP gives a tighter air barrier when the tape is installed correctly. Tyvek is more forgiving and costs less. The right pick depends on climate, cladding, budget, and crew experience.
Do I need both an air barrier and a water barrier?
Yes. The water-resistive barrier keeps liquid water out of the wall. The air barrier keeps air (which carries water vapor) from leaking through. Some products do both jobs — ZIP System and fluid-applied membranes are common dual-purpose options. House wrap is primarily a water barrier; treating it as an air barrier requires meticulous taping that most jobsites skip.
Is ZIP System better than Tyvek?
ZIP System is faster to install and air-seals better when the tape is applied correctly. Tyvek is cheaper, more forgiving, and easier to repair. Neither is universally “better.” See our ZIP vs Tyvek head-to-head for the spec-by-spec read.
What is the difference between a structural sheathing system and house wrap?
Structural sheathing systems like ZIP and LP WeatherLogic combine the wall sheathing and the water-resistive barrier into one panel. Conventional framing uses OSB or plywood sheathing plus a separate house wrap stapled over the top. The integrated systems save a labor step; the conventional approach is cheaper in materials and easier to repair.
How long can a WRB be left exposed before siding goes on?
Tyvek HomeWrap is rated for 120 days of UV exposure. ZIP System has a 180-day exposure guarantee. LP WeatherLogic is also rated at 180 days. Fluid-applied products vary by formulation — check the data sheet. Exceeding the exposure window doesn’t guarantee failure but it does void the manufacturer warranty.
Does an integrated sheathing system replace house wrap?
Yes. When ZIP System or LP WeatherLogic is installed and taped per the manufacturer instructions, it functions as the code-required water-resistive barrier. Adding a layer of house wrap on top is not recommended — it can trap moisture against the sheathing face.
Want this for your build?
SwagerBuilds is based in Teton Valley, Idaho. We build custom homes in Driggs, Victor, Tetonia, and the surrounding corridor. If you’re trying to figure out the right WRB for a build, we’re happy to walk through it on the phone. Get in touch.
Cost-plus vs fixed-price is the contract decision that decides how much budget risk you carry on an Idaho custom home — and most homeowners sign one without understanding the other. The complaint you see again and again in builder reviews, “it cost way more than we were told,” almost always comes down to which contract type was used and how transparent the builder was. Here is a builder’s straight comparison of cost-plus vs fixed-price for an Idaho custom home, and which one actually protects you.
What is a cost-plus contract on a custom home?
A cost-plus contract on a custom home means you pay the actual cost of materials and labor, plus the builder’s fee — either a fixed fee or a percentage, usually 15–20% in this market. The upside is transparency: with a true open-book cost-plus, you see every invoice and every receipt. The downside is that your final price is not locked. If lumber spikes or the project drags, you absorb it. Cost-plus rewards an honest, organized builder and punishes you under a sloppy one, because there is no ceiling forcing discipline.
What is a fixed-price contract on a custom home?
A fixed-price (or lump-sum) contract on a custom home locks one number for the whole defined scope. You know the price up front, and the builder carries the risk of cost swings on everything that was specified. The catch is in those last two words: everything that was specified. A fixed price is only as solid as the scope behind it. If the scope is thin and the allowances are soft, a “fixed” price turns into a parade of change orders — which is just cost-plus wearing a fixed-price mask.
Cost-plus vs fixed-price: which protects your budget?
In the cost-plus vs fixed-price question, the better budget protection comes from a fixed price built on a genuinely detailed scope — for most homeowners, most of the time. A fixed price puts the risk of overruns on the builder instead of you, which is exactly where it belongs if the builder did the work to price it right. Cost-plus can be the better tool on a true unknown — a heavy remodel where you cannot see inside the walls yet — but only with a builder you trust to run an open book. If a builder pushes cost-plus on a straightforward new build, ask why they will not stand behind a number.
How transparency changes the cost-plus vs fixed-price decision
Transparency is what really settles the cost-plus vs fixed-price decision, because either contract fails with a builder who hides the numbers. An open-book cost-plus with weekly cost reporting can be safer than a fixed price hiding fat margins in soft allowances. The question is not just “which contract,” it is “can I see how this builder prices and tracks money.” At SwagerBuilds we lead with clear pricing and fully detailed scopes precisely so the contract type becomes a preference, not a gamble — you can see the real numbers either way.
Questions to ask before choosing cost-plus vs fixed-price
Before you choose between cost-plus vs fixed-price, put these questions to your Idaho builder. Ask: “If it is fixed price, how detailed is the scope and how many items are still allowances?” Ask: “If it is cost-plus, do I see every invoice, and is the fee fixed or a percentage?” Ask: “What is your change-order process either way?” Ask: “How often will I get a cost-to-complete update?” The answers tell you whether you are buying a price or buying a relationship with a moving number.
The bottom line on cost-plus vs fixed-price
Cost-plus vs fixed-price is less about the label and more about the scope and the transparency behind it. A fixed price on a tight, detailed scope is the cleanest budget protection for a typical Idaho new build. Cost-plus has its place on real unknowns, but only with an open book. Either way, the builder who shows you real numbers before you sign is the one protecting your budget — and the one whose reviews will not be full of overrun complaints.
Not sure which contract fits your project? Talk to SwagerBuilds — we’ll walk you through cost-plus vs fixed-price for your build in Eastern Idaho, Teton Valley, or Jackson Hole with real numbers, not guesses.
Our Jackson Hole custom home builder coverage has been consolidated onto a single canonical page with updated 2026 content, construction cost tiers, Teton County WY permit reality (2024 IRC/IBC and Energy Mitigation Program), and Jackson-side subdivision detail.
Two things surprise most owners building in Driggs, Idaho: the HOA design review layer, and how much the winter calendar dictates the schedule. Neither shows up on a permit checklist, and both can add months to a project. Bryce Swager is a 4th-generation Rigby and Teton Valley local — his great-grandfather owned Swager Ford in Rigby and his father still runs Swager & Swager, the Rigby accounting firm. Here is how design review and the build season actually work on the Idaho side of the Tetons.
If you are earlier in the process — still comparing builders, contract structures, and costs — start with the Driggs custom home builder page, which covers pricing, fixed-price contracts, and lot feasibility in full.
Which Driggs subdivisions run their own design review?
Design review in Driggs regularly comes up in Teton Springs, Targhee Hill, Tributary, Huntsman Springs, River Rim Ranch, and dozens of smaller subdivisions. Each HOA sets different rules: minimum square footage, allowed exterior materials, roof pitch requirements, dark-sky lighting standards, and approved exterior color palettes.
This layer sits on top of Teton County ID or City of Driggs permitting — it does not replace it. Owners who assume a building permit is the only approval needed are the ones who lose a season.
How long does HOA design review add to a Driggs build?
Budget 30 to 90 days for HOA design review, and treat it as a gating item before permit submittal rather than something to run in parallel. A resubmittal after a rejected material or roof pitch can add another full review cycle.
Total build time in Driggs typically runs 10–16 months from contract to move-in. Design review, limited winter work days, and stretched sub-trade availability are the three reasons it runs longer than a comparable Idaho Falls project.
Can you build through a Driggs winter?
Yes, but productivity drops 30-40% from December through March. The sequencing that works: foundation pours land before freeze, the structure gets dried in by October, and winter is used for interior work — mechanical, drywall, millwork, and finish.
Miss dry-in before the first hard freeze and the whole schedule slides to the following spring. That single sequencing decision is worth more to a Driggs timeline than almost anything else on the schedule.
How design review and winter sequencing affect cost
Driggs construction generally runs $400 per square foot and up of conditioned space depending on finish level — roughly $400/sq ft and up mid-range and $400/sq ft and up high-end. Design review pushes cost upward when an HOA mandates specific materials, and winter work carries temporary heat, protection, and reduced-productivity costs.
A Boise or out-of-valley builder shipping crews to Driggs adds 25-40% to labor cost on top of that, and typically has not priced HOA resubmittals or winter protection into the original number.
What local knowledge actually changes here
A builder who works Teton Valley regularly knows Teton County building code (different from Bonneville and Madison), which HOA boards want what, snow load engineering above 6,200 ft elevation, winter concrete protocols, and the local sub-trade network that answers the phone in February.
Questions to ask about design review and winter scheduling
Which Teton Valley HOA boards have you submitted to, and how many resubmittals did it take?
Who prepares and carries the design review package — you or me?
What is your target dry-in date, and what happens to the schedule if we miss it?
How do you price winter temporary heat and protection?
How many homes have you built in Driggs, Victor, or Tetonia in the past 5 years?
Show me 3 completed Teton Valley homes of similar scope and budget.
Can I see live JobTread access on an active project?
What is your warranty?
Why a 20-year Teton Valley builder
Bryce Swager is a 4th-generation native of Rigby and Teton Valley. His great-grandfather owned Swager Ford, the Rigby Ford dealership. His grandfather and father started Swager & Swager, the Rigby accounting firm his father still runs today. The Swager family has worked the Teton side of the pass as long as it has worked the Snake River side — close to a century.
That heritage matters in three concrete ways: supplier relationships span the pass and go back generations; Teton County code and HOA review are familiar territory rather than something learned on your build; and the Swager family is not going anywhere when the market cools.