
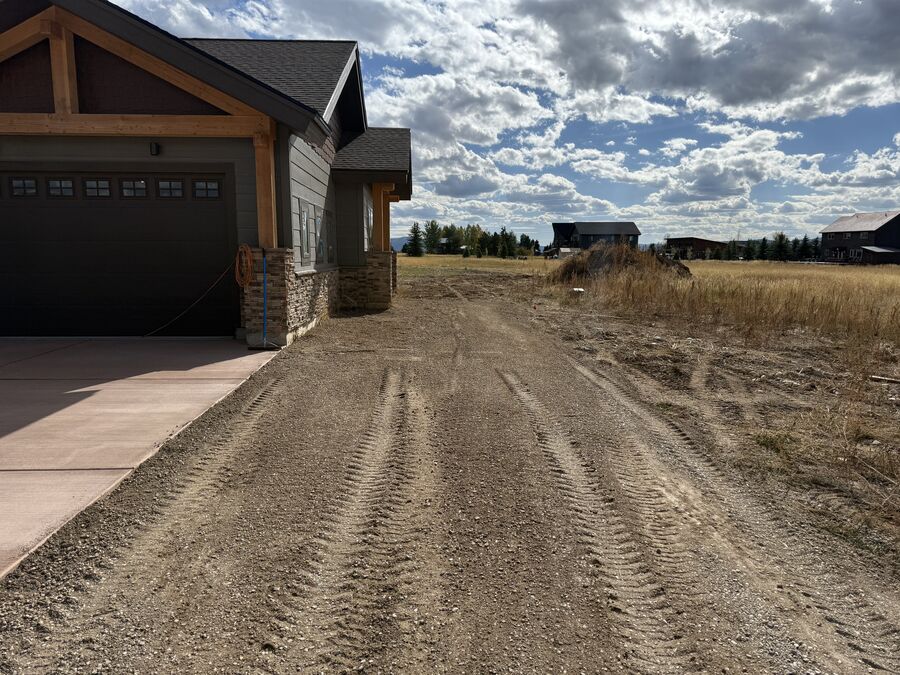
TL;DR: To prepare land to build a house in Idaho, you work in a set order: boundary survey and soils report, septic site evaluation and permit, well drilling, power and driveway access, then clearing, excavation and grading under a county grading permit. Run it out of order and you pay for it twice. Plan on one to three seasons, and remember site prep is priced separately from the house.
Contents
- What does it mean to prepare land to build a house?
- In what order do you prepare land to build a house?
- Do I need a survey and a soils report first?
- How do septic test holes and the septic permit work?
- When should the well get drilled?
- How do power, the driveway and access get handled?
- What happens during clearing, excavation and grading?
- Raw land vs. a subdivision lot: how much prep is there?
- How long does land prep take in Teton Valley?
- What does land prep cost, and is it in the per-square-foot price?
- What does SwagerBuilds handle on the land side?
- Frequently asked questions
What does it mean to prepare land to build a house?
Preparing land means turning a piece of dirt into a buildable site: you know where the lines are, what the soil will carry, where the wastewater goes, where the water comes from, how power and a truck get in, and the pad is cut, drained and ready for footings. None of that is the house. All of it has to be right before the house can start. When people ask me how to prepare land to build a house, that list is the answer.
I’ve been building in Eastern Idaho for 20 years, and I’m involved in every phase of every build. The most expensive mistakes I see don’t happen in framing or finishes. They happen in the first 90 days on the land, when an owner orders the steps by what feels exciting instead of what the ground dictates. Clearing trees feels like progress. Clearing trees before the septic test holes are dug can put the drainfield in the only spot you wanted the house.
If you haven’t bought the lot yet, start with my guide to building on your own lot or land in Idaho, which covers what to check before you close. This post picks up after you own it and need to prepare land to build a house on it.
In what order do you prepare land to build a house?
You prepare land to build a house in this order: survey, soils, septic permit, well, utilities and access, then earthwork. Each step answers a question the next step depends on. Here’s the sequence I run on raw ground in Teton Valley and the rest of Eastern Idaho.
| Step | Who does it | What it tells you | What goes wrong if you skip or reorder it |
|---|---|---|---|
| 1. Boundary survey and topo | Licensed land surveyor | Exact lines, setbacks, slope, easements | House, well or drainfield lands in a setback or easement |
| 2. Soils (geotechnical) report | Geotechnical engineer | Bearing capacity, groundwater, fill needs | Footings sized by guess; surprise over-excavation mid-dig |
| 3. Septic site evaluation and permit | Health district specialist, with test holes | Where the drainfield can legally go and what type | You clear or pad the only spot that perks |
| 4. Well | Licensed Idaho well driller | Water depth, flow and quality | Foundation poured before you know if there’s usable water |
| 5. Power, driveway and access | Utility, county road department, excavator | How service and trucks reach the pad | Concrete trucks can’t reach the site; line extension delays the start |
| 6. Clearing, excavation, grading | Excavation contractor under a grading permit | A drained, compacted pad at the right elevation | Water runs toward the house; frost heave; failed inspections |
Design runs alongside all of this. The site plan the county wants shows the house, the well, the septic and the driveway together, so the land work and the drawings have to talk to each other from day one.
Do I need a survey and a soils report first?
Yes. When you prepare land to build a house, the survey and the soils report come first because every other decision sits on top of them.
A boundary survey sets the corners and the lines. A topographic survey maps the slope and elevations, which is what the designer and excavator use to set the finished floor height and plan drainage. In Teton County, Idaho, the building department’s design standards checklist requires a site plan prepared by a design professional that shows property lines, setbacks, septic and well locations, wetlands, flood hazard areas, easements and ditches. You can’t draw that without a survey.
The soils report is where people try to save money, and it’s the wrong place. A geotechnical engineer digs or bores test pits, then tells you what the ground will carry and whether you have groundwater near the surface. On the Teton Valley floor we deal with river cobble and a high water table. On the benches we deal with slope. Either one can change the foundation design. You want that news on paper before the engineer stamps the footings, not when the excavator is standing in water.
One more reason to do it early: Teton County, Idaho, sets frost depth at 32 inches from the bottom of the footing to finished grade, “or as determined by a soils investigation.” The soils report can change what’s required. It can’t do that after the footings are in.

How do septic test holes and the septic permit work?
If you’re not on city sewer, the septic permit decides your site layout, and it’s the step that most often decides how long it takes to prepare land to build a house. The house goes where the drainfield doesn’t.
In Eastern Idaho, septic permits run through Eastern Idaho Public Health. Per their current permit packet, an Environmental Health Specialist has to go on-site to evaluate the application, test holes may be required to determine soil type, limiting layers and water level, and you should plan for a minimum of two weeks for processing. The application needs a plot plan showing existing and proposed systems, replacement areas, wells, surface water, slopes and property lines. The published fee for an individual system permit is $900, a speculative site evaluation is $450, and a permit is valid for two years with a $50 renewal. Those are the health district’s numbers, not mine, so confirm them when you apply.
What the packet won’t tell you is the field reality. Test holes need open, unfrozen ground and an excavator to dig them. In Teton Valley that usually means late spring through fall. If you close on land in November and want to break ground in May, the septic evaluation is the first thing I’d schedule once the ground thaws, because the permit can dictate whether you need a standard gravity system or something engineered. That choice moves both the budget and the house location.
The other thing to protect is the replacement area. The health district wants a second drainfield location reserved. Don’t let anyone drive heavy equipment or stockpile dirt on either area. Compacted soil can fail a site that would have passed.
When should the well get drilled?
Drill the well after the septic layout is known and before the foundation is poured. You want to know you have usable water before you’ve spent six figures on concrete and framing.
Idaho regulates well construction through the Idaho Department of Water Resources. For a single-family domestic well, the owner and a licensed Idaho well driller file a start card permit with IDWR, and the IDWR start card lists minimum setbacks of 50 feet from a septic tank and 100 feet from a drainfield. That’s why the septic layout comes first. The well and the drainfield compete for the same ground, and the drainfield usually wins.
Water depth is the part nobody can promise. Lots a mile apart can hit water at very different depths, and the driller bills by the foot. I break down the market numbers for drilling, pumps and septic systems in my post on well and septic cost in rural Idaho. After the well is in, get the water tested. A lender or buyer will ask for it someday, and you’d rather know now whether you need treatment.
How do power, the driveway and access get handled?
Call the power utility early. Line extensions and transformer sets on rural land can take months to schedule, and the cost depends on how far the nearest service is from your pad. Get the utility’s design and quote in writing, then plan the trench route so it doesn’t cross the drainfield or the replacement area.
The driveway is its own project on a lot of Teton Valley land. It has to carry loaded concrete trucks and a lumber delivery in spring mud, and later it has to be plowable. If it connects to a county road, you’ll need an approach permit from the road authority. I build the driveway base early for a simple reason: a site that trucks can’t reach in April is a site that sits idle in April.
Think about staging too. Where do materials get dropped? Where does the dumpster sit? Where does the crew park? A pad with no room around it slows every trade that follows.
What happens during clearing, excavation and grading?
This is the part most people picture when they think about preparing land: trees out, dirt moved, pad cut. It comes last when you prepare land to build a house because it’s the hardest to undo.
- Permit first. Teton County, Idaho, ties the site plan to an approved Grading and Erosion Control Permit, and the documents have to match. Silt fence and erosion control go in before the dirt moves.
- Clearing. Only clear what the house, driveway, utilities and staging need. Trees you keep are trees you don’t have to pay to replace in landscaping.
- Strip and stockpile topsoil. Save it in a spot away from the septic areas. You’ll want it back for final grade.
- Excavation. The hole gets cut to the depth the engineer and the frost line require. If the soils report called for over-excavation and structural fill, it happens here, and the fill gets compacted in lifts and tested.
- Drainage and rough grade. The ground around the house has to slope away from it. In snow country that matters more, not less, because every spring the melt has to go somewhere.
Snow load is the other reason engineering matters on the land side. Teton County’s design standards set a minimum roof snow load of 85 psf below 6,600 feet and 100 psf at or above 6,600 feet, plus dead load and drift. Heavier roofs mean heavier footings, and footings sit on the ground your soils report described. It’s one chain. I walk through every inspection that follows in what custom home inspections happen.
Raw land vs. a subdivision lot: how much prep is there?
A lot in a platted subdivision with city services can skip half this list. Raw acreage gets all of it. Here’s the honest comparison.
| Item | Serviced subdivision lot | Raw rural land |
|---|---|---|
| Survey | Corners usually set; still verify | Full boundary and topo needed |
| Wastewater | Sewer tap and connection fee | Septic evaluation, permit and system |
| Water | Water tap and connection fee | Well, pump and water test |
| Power | Stubbed to the lot line | Possible line extension and transformer |
| Access | Paved street frontage | Driveway build, approach permit |
| Design review | HOA or architectural committee common | County only, usually |
| Schedule risk | Lower | Higher: season, utility and permit lead times |
Subdivision lots aren’t automatically easier. HOA design review adds its own timeline, and some Teton Valley subdivisions still use individual wells and septic. Read the CC&Rs and the plat notes before you assume anything.
How long does land prep take in Teton Valley?
On raw land, plan on one to three seasons to prepare land to build a house, from closing to a pad ready for footings. The work itself isn’t that slow. The calendar is.
The survey can happen almost any time of year. The soils work, septic test holes and excavation need thawed ground. Utility scheduling and permits run on other people’s timelines. A realistic pattern I see: close in the fall, survey over the winter while design moves forward, septic evaluation and soils in spring, well and power in early summer, then earthwork once the grading permit is in hand. Teams that start that sequence the season before they want to build are the ones that break ground on time.
For how the rest of the build lines up after the pad is ready, see the start-to-finish checklist for building a custom home in Idaho.
What does land prep cost, and is it in the per-square-foot price?
No. What it costs to prepare land to build a house isn’t in the per-square-foot price. My construction pricing starts at $400 per square foot and goes up in Teton Valley and the rest of Idaho, and starts at $1,000 per square foot in Jackson Hole. That’s construction cost for conditioned square footage. Site work, well, septic, utility extensions, survey, soils and permits sit outside it.
What those items cost depends almost entirely on the ground. The health district’s septic fees above are published. Well drilling, septic systems and trenching vary with depth, soil and distance, and the market ranges I track are in the well and septic cost guide, labeled as market data. The bigger swing is earthwork: cobble, groundwater, slope and driveway length can make two lots on the same road differ by a lot. I lay out every cost that sits outside the construction number in the hidden costs of building a custom home.
Here’s what’s not included in any number you’ll see from me before design: a real site budget. That comes out of the design agreement, after the survey and soils are back, because that’s the first moment anyone actually knows what the ground will cost.
What does SwagerBuilds handle on the land side?
You don’t have to assemble a land team yourself. Site work is part of how I run every project, starting in the design agreement.
- Design agreement. Scope, site conditions and finishes get locked before a construction price is signed. The design fee is a fixed design fee, quoted per project. More on how that works on our custom home design services page.
- Survey, soils and engineering coordination. I bring in the surveyor, geotechnical engineer and structural engineer and get their work onto one site plan. See design and engineering.
- Permits. Septic, well start card, grading and erosion control, driveway approach and the building permit. The county-by-county paths are on our Idaho building permits by county page.
- Earthwork and utilities. Excavation, grading, trenching and driveway base get scheduled in the right order under a fixed construction contract.
Every SwagerBuilds job runs 24/7 site cameras, so if you’re watching your land get prepped from out of state, you can see it happen. If you own land in Teton Valley, Eastern Idaho or Jackson Hole and want the prep sequence mapped for your specific parcel, start a conversation here.
Frequently asked questions
How do you prepare land to build a house?
Get a boundary and topographic survey, then a soils report. Next, get the septic site evaluation and permit if you’re not on sewer, drill the well, arrange power and driveway access, and finish with clearing, excavation and grading under a county grading permit. The order matters because each step decides where the next one can go.
What should be done first when preparing land to build?
The survey and soils report come first. The survey sets lines, setbacks and slope for the site plan. The soils report tells the engineer what the ground can carry and whether groundwater or poor soil will change the foundation design.
Should the well or the septic go in first?
Settle the septic layout first, then drill the well. Idaho’s domestic well start card requires at least 50 feet from a septic tank and 100 feet from a drainfield, and the drainfield location is set by where the soil passes the health district’s evaluation.
How long does it take to prepare land to build a house in Teton Valley?
Usually one to three seasons on raw land. Soils testing, septic test holes and excavation need thawed ground, and utility and permit lead times run on outside schedules. Starting the sequence a season before you want to break ground keeps the build on time.
Is site prep included in a builder’s price per square foot?
Not at SwagerBuilds. Construction pricing starts at $400 per square foot and goes up in Teton Valley and Idaho, and starts at $1,000 per square foot in Jackson Hole. Site work, well, septic, utilities, survey, soils and permits are budgeted separately once the site is known.